

Getting to Know the Excel Interface: A Complete Guide for Beginners
If you have just opened Microsoft Excel for the first time, it is normal to feel a bit lost. There are many buttons, menus, bars, and tools that can seem complicated at first glance. The good news is that the Excel interface was developed to make the user's work easier. Once you understand where each tool is located and what it is for, using the program becomes much simpler. In this guide, you will get to know the main elements of the Excel interface and understand how each one contributes to boosting your productivity.
EXCEL BÁSICO
OkanoLOR
7/2/20265 min read


What is the Excel interface?
The Excel interface is the set of visual elements that appear when the program is opened.
It allows you to access all the tools available for creating, editing, and analyzing spreadsheets.
Each part of the screen has a specific function, and getting to know these elements is the first step to mastering Excel.
Main interface elements
1. Title Bar
The Title Bar is located at the top of the window.
It displays:
The name of the open spreadsheet;
The program name (Microsoft Excel);
The minimize, maximize, and close buttons.
This bar also lets you know when the file has changes that haven't been saved yet.
2. Quick Access Toolbar
Just above the Ribbon, there is a small bar containing frequently used commands.
Among them:
Save
Undo
Redo
You can also customize this toolbar by adding the commands you use most often.
💡 Tip: Customizing this toolbar can save you a lot of clicks while working.
3. Ribbon
The Ribbon is the heart of Excel.
It brings together practically all the program's tools, organized into tabs.
The main ones are:




Home
The most frequently used tab.
In it, you will find:
Text formatting;
Alignment;
Colors;
Borders;
Conditional formatting;
Inserting and deleting rows and columns.


Insert
Allows you to add various elements to the spreadsheet.
Examples:
Tables;
Pictures;
Icons;
Shapes;
Charts;
Slicers;
PivotTables.


Page Layout
Controls the spreadsheet appearance for printing.
You can change:
Margins;
Orientation;
Paper size;
Page breaks.


Formulas
Contains all Excel functions.
Among them:
SUM
AVERAGE
IF
XLOOKUP
SUMIF
COUNTIF
It also allows you to manage defined names and audit formula errors.


Data
Used to import, organize, and analyze information.
You will find tools such as:
Sort;
Filter;
Remove Duplicates;
Text to Columns;
Power Query;
Refresh connections.


Review (Revisão)
Focused on document reviewing.
It allows you to:
Insert comments;
Protect spreadsheets;
Check spelling;
Track changes.


View
Controls how the spreadsheet is presented.
Some options include:
Freeze Panes;
Zoom;
Show Gridlines;
Formula Bar.


Formula Bar
Just below the Ribbon is the Formula Bar.
It has two main functions:
Display the content of the selected cell;
Allow you to edit formulas.
Whenever you click on a cell, its content will appear in this bar.


Name Box
To the left of the Formula Bar is the Name Box.
It shows the reference of the selected cell.
Example:
A1
C15
G28
It also allows you to quickly navigate to any cell in the spreadsheet.


Rows and Columns
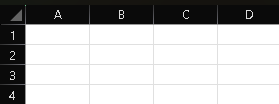
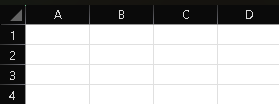
Every spreadsheet is made up of rows and columns.
Columns are identified by letters: A, B, C, D...
Rows are identified by numbers: 1, 2, 3, 4...
The intersection between a row and a column forms a cell.
Cells
Cells are the place where data is stored.
You can insert:
Text;
Numbers;
Dates;
Formulas;
Images;
Links.
Each cell has a unique address.
For example:
A1
B7
D15
F102
Sheet Tabs
At the bottom of the screen are the sheet tabs.
Each file can contain multiple worksheets.
You can:
Create new ones;
Rename;
Change colors;
Move;
Delete.
This makes data organization much easier.


Status Bar
The Status Bar is located at the bottom of the window.
It displays quick information such as:
AutoSum;
Average;
Count of selected cells;
Zoom.
Many users use this bar daily without even realizing it.


Zoom Control
In the bottom right corner, you will find the Zoom Control.
With it, you can zoom in or out to adjust the spreadsheet view.
This makes it easier to work on both small screens and large monitors.
Why get to know the Excel interface?
Before learning advanced formulas, charts, or automation, it is important to master the interface.
Knowing where each tool is located allows you to:
Work faster;
Find features easily;
Reduce errors;
Boost productivity.
Even experienced users constantly rely on the elements presented in this article.
Getting to know the Microsoft Excel interface is a fundamental step for anyone wishing to master this powerful tool.
By understanding the function of each bar, menu, and pane, you will gain the confidence to explore more advanced features and work much more efficiently.
Remember: no one learns Excel overnight. The secret is to practice constantly and evolve one step at a time.
Now that you know the Excel interface, we recommend reading the next articles in our Knowledge Library:
How to create your first spreadsheet in Excel
Rows, Columns, and Cells: understand the structure of spreadsheets
How to save and open files correctly
Cell formatting: make your spreadsheets look more professional
BaRD Nexus Tip
This article is part of our Knowledge Library, a collection of free content about Excel, website development, applications, and automation. Bookmark this page and follow the next publications to evolve from basic to advanced level.
Tips for beginners
If you are just starting out, follow these recommendations:
Explore all the tabs on the Ribbon;
Hover your mouse over the icons to read their descriptions;
Use keyboard shortcuts whenever possible;
Practice by creating small spreadsheets daily;
Don't be afraid to test the tools.
Practice is the best way to learn Excel.