

How to Create Your First Spreadsheet in Excel – A Complete Guide for Beginners
If you are starting out in the world of Microsoft Excel, creating your first spreadsheet can seem like a complicated task. However, with a few basic concepts, you will realize that organizing information and performing calculations is much simpler than it looks. In this guide, you will learn step-by-step how to create a professional spreadsheet, from opening Excel to organizing your data. By the end of this article, you will be able to create an organized spreadsheet that is ready to receive information.
EXCEL BÁSICO
OkanoDev
7/7/20264 min read


What is a spreadsheet?
A spreadsheet is a document made up of rows and columns used to store, organize, and analyze information.
It can be used for:
Financial tracking;
Customer lists;
Inventory management;
Production control;
Budgets;
Schedules;
Reports;
Personal planning.
Each piece of information is stored in a cell, allowing the data to be easily manipulated.
Step 1 – Opening Microsoft Excel
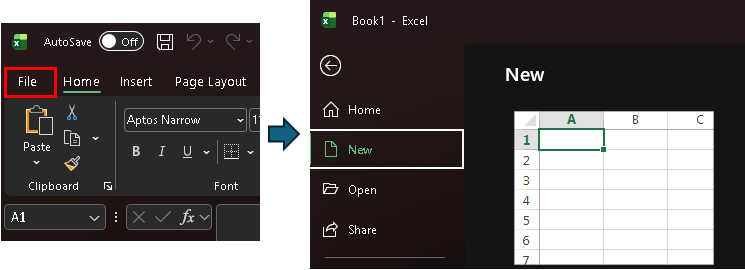
After opening Microsoft Excel, you will see the program's home screen.
Click on: File → New → Blank Workbook
A new spreadsheet will be created automatically.
At this moment, you will see:
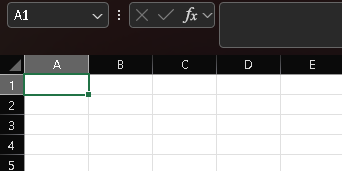
Columns identified by letters;
Rows identified by numbers;
A selected cell (usually A1).
This will be your workspace.
Step 2 – Understanding the spreadsheet structure
Every spreadsheet is made up of:
Columns
Represented by letters.
Example: A, B, C, D, E...
Rows
Represented by numbers.
Example: 1, 2, 3, 4, 5...
Cells
The intersection between a row and a column forms a cell.
Examples: A1, B3, C10, F25
It is inside the cells that we type all the information.
Step 3 – Creating a simple expense tracker
Let's create a simple spreadsheet to understand how everything works.
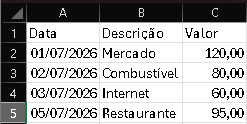
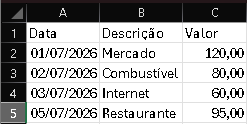
Type exactly the following headers:
A B C
Date Description Value
Now fill in a few rows.
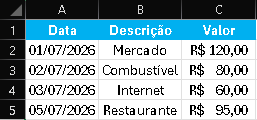
Date Description Value
01/07/2026 Grocery 120.00
02/07/2026 Fuel 80.00
03/07/2026 Internet 60.00
05/07/2026 Restaurant 95.00
Done.
Your first spreadsheet is now created.
Step 4 – Adjusting column width
It is common for some text to get cut off.
To fix this:
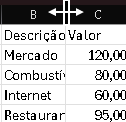
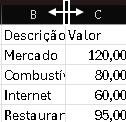
Hover your mouse between two column letters.
Example: Between B and C.
When the cursor changes shape, double-click.
Excel will automatically adjust the column width. This feature is called AutoFit.
Step 5 – Formatting the header
Now let's make the spreadsheet look better.
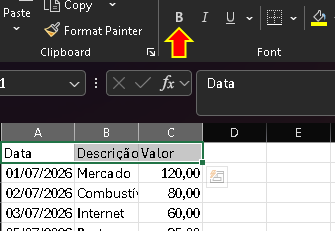
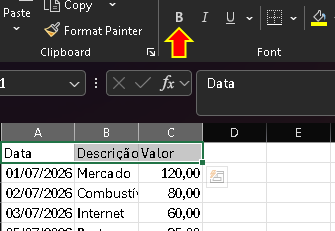
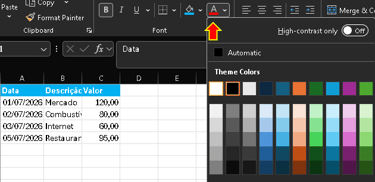
Select range: A1:C1
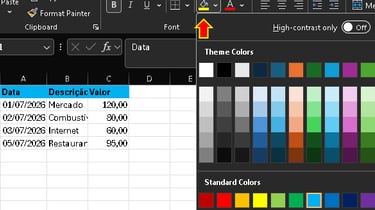
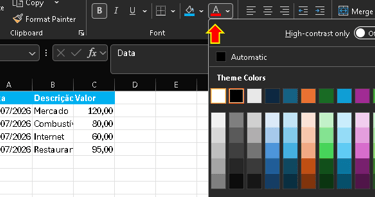
On the Home tab, apply:
Bold
Green or blue background fill
White font color
Center text alignment
The header will look much more professional and organized.
Step 6 – Formatting values
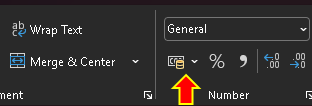
Select all the values in the "Value" column.
Click on: Home → Number → Currency
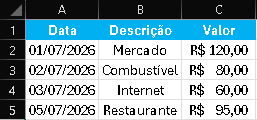
Now the numbers will appear correctly formatted.
Example:
$120.00
$80.00
$60.00
$95.00
Step 7 – Creating a table
This is one of the most important features in Excel.
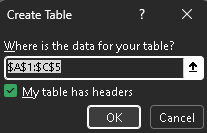
Select all the data.
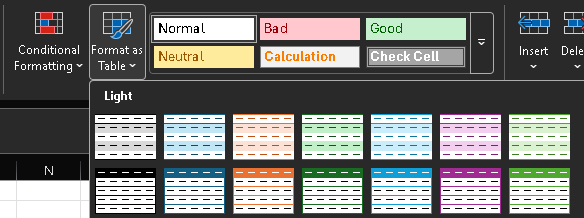
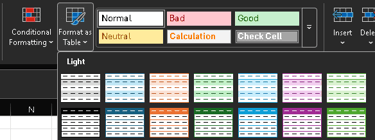
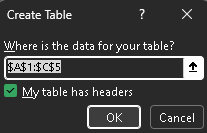
Then click on: Insert → Table
Check the box: My table has headers
Click OK.
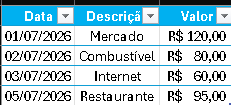
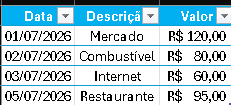
Now your spreadsheet will have:
Automatic filters;
Organized colors;
Automatic expansion;
A better look.
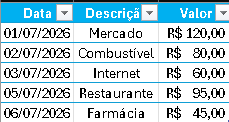
Step 8 – Inserting new data
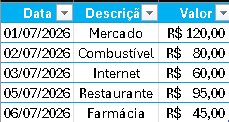
Whenever you need to add new information, simply fill in the next row.
Example:
Date Description Value
06/07/2026 Pharmacy $45.00
The table will expand automatically.
Step 9 – Saving your spreadsheet
Click on: File → Save As
Choose the folder where you want to save it.
Type a name.
Example: Financial_Tracker.xlsx
Click Save.
Your spreadsheet is now ready to use!
Common beginner mistakes
Many people make a few mistakes right at the beginning.
Avoid:
❌ Mixing titles and data.
❌ Leaving blank rows.
❌ Writing multiple pieces of information in the same cell.
❌ Not saving frequently.
❌ Using too many different colors.
A clean spreadsheet is always much easier to understand.
Best practices
Whenever you create a new spreadsheet:
✓ Use clear titles.
✓ Organize data into columns.
✓ Do not leave empty rows.
✓ Save frequently.
✓ Convert your data into a Table.
✓ Use consistent formatting.
These practices make future analysis much easier.
BaRD Nexus Tip
Before learning complex formulas, develop the habit of creating well-structured spreadsheets. Good organization makes analysis easier, reduces errors, and makes work much more efficient.
Remember: a powerful Excel starts with a simple and well-organized spreadsheet.
Creating your first spreadsheet is the first step to mastering Microsoft Excel.
With just a few minutes of practice, you can already organize information, log data, and prepare professional documents.
In the next articles of our Knowledge Library, you will learn how to use formulas, charts, tables, and advanced features to transform your spreadsheets into true management tools.


Create a spreadsheet to track your monthly expenses.
It must contain:
📅 Date
📝 Description
💰 Value
Then:
Format the values as currency.
Apply a color to the header.
Convert the data into a Table.
Save the file.